RSS

Wednesday, January 27, 2010

Growing Vegetables in a Bale of Straw

Why use straw bales?

1. First, bale gardening brings your vegetables to a height you can maintain them.
2. Second, you do not have to weed your bale garden.
3. Third, straw bales can be recycled after 1 or 2 years as compose.
4. Fourth, both vegetables and flowers can be grown in straw bales. Many times in the same bale's.
The best way is to plan your bale garden area before physically putting the bales in place. How many bales do you need? Well this depends on how many plants you want to take care of. Therefore, you need to know how many plants can be planted per bale. So here are some basic guidelines you can go by:
Dwarf determinant tomatoes - two per bale
Cucumbers - six plants per bale
Squash, zucchini, and melons - three plants per bale
Peppers - four plants per bale
Bush beans - 12 to 15 plants per bale
Bush peas - 12-15 plants per bale
How Many Bales Do You Have Room For?
  1. First figure out where you are going to lay out your garden.
  2. Second, figure out how many feet of space you will need.
  3. Third, find out the length and width of the straw bales you are using.
  4. Fourth, make sure your plan leaves two feet around each bale. This will allow easy access to all four sides of each bale. (However, if gardening is done in a wheel chair, you need to allow at least forty-eight inches around each bale for easy movement).
  5. Last, use grid paper to lay out your garden area. For instance, each grid can represent 6 inches, 1 foot, 2 feet, 3 feet, or whatever size you want to make each grid.
Once you have your garden area laid out on paper, you will know exactly how many bales to put in the garden area you have set aside. Place your bales so that you have at least two feet between the bales.

This will give you ample room to tend the plants between the bales. If a person needs a wheel chair, plan the area between the bales to accommodate the wheel chair.

One word of caution is to make sure the bales are exactly where you want them placed. Once you have soaked them in water, you will not be able to move them. The best way is to plan your bale garden before physically putting the bales in place.

Here are some reasons for using straw bales. First straw bales bring your vegetables high enough for easy maintenance and harvesting. Second you do not need to weed your plants. Last, straw bales can be recycled after 1 or 2 years as compose.

It is advisable to plan your garden first. I suggest using grid paper to lay out your garden. First figure out how many feet of garden space you will need. Second, find the length and width of the straw bales you are using. Fourth, figure out how many plants you want. Fifth, using grid
paper lay out your garden area. For instance, each grid can represent 6 inches, 1 foot, 2 feet, 3 feet, or whatever size you want to make each grid.

Once you have your garden area laid out, place your bales so that you have at least two feet between the bales. This will give you ample room to tend the plants between the bales. If a person needs a wheel chair, plan the area between the bales to accommodate the wheel chair.

One word of caution is to make sure the bales are exactly where you want them placed. Once you have soaked them with water, they will not be able to be moved. This is why it is best to plan your bale garden in advance.

Straw Bale Gardening

A Different Concept in Gardening Even for the Beginner

Straw bale gardening has been around for years. Amazingly so, there are people who have never heard of this concept. I, too had never heard of it and was very skeptical. My sister e-mailed me several articles that she found on the Internet and I decided to give it a try.

I am now happy to report that even though it is the first of September, I am still getting tomatoes and peppers off of my vines. Straw bale gardening might be stereotyped as the "lazy" gardener because it suggests that you will have a lot less bending and stooping and very little to no weeds to deal with. I tried both the straw bale gardening and the traditional gardening this summer and I have been very pleased with my straw bales. I followed the instructions exactly as they were given to me, using plants instead of seeds and have no weeds and my knees are very thankful because I have not had to stoop or bend very far to tend to my garden. My traditional garden has long dried up albeit for a few green tomatoes, but my straw bale garden is still thriving as you can see from the photo I took. I cannot promise you that you will have the success with it that I did, but again, I too was skeptical but decided to try it anyway. There was a brief period of time when I had grass growing in them and I almost gave up, especially when being teased by my family and friends of having a "grass garden", but the grass eventually withered away and I have been left with a very gorgeous, bountiful straw bale garden. I have outlined the steps below as described in the website, www.beginner-gardening.com/straw-bale-gardening.html.

1. Begin with tightly strung straw bales. Four bales were used in my garden. Place your straw bales where you would like them to stay, since when they become wet they will slowly begin to break down, the strings may loosen or break and you may need to place a few stakes around them to hold them together. Mine have only broken down slightly and I have not had to do this.

2. Wet the straw bales down for the first three days, watering them down a couple of times a day. I watered mine once in the morning and once in the evening.

3. On the fourth through seventh days, do nothing. The bales will heat up and begin to "cook" as they begin to decompose.

4. After the seventh day, place a layer of soil (use a weed free, compost soil mixture) on top of the bales. I placed about an inch to an inch and a half of soil followed by a "misting" of water.

5. Plant your seeds or transplants. If using plants, use a trowel to push the soil back far enough to put your plant in the bales. Be careful not to break the strings. I used four tomato plants in one bale, six pepper plants in another bale and then repeated for the other two bales.

6. Water daily. Straw does not hold as much water as soil so it is very important to water daily, especially in the hot summer months in between rainy days.

7. Use a substance such as Miracle Gro about every week or so to promote growth and to supplement the nutrients in your soil. I generally used Miracle Gro about once every two weeks for the first month or so and then dropped back to using the Miracle Gro periodically after that.

Straw bale gardening is a unique way to grow beautiful vegetables and flowers especially if you have back and knee problems, have limited space or just want to try something new. It is a great feeling to go around the side of the house and pick fresh vegetables and not have to worry about weeds, insects or a nagging backache after wards. It is a fun way to garden and is very rewarding.

Top 5 Gardening Activities for February

February can be unpredictable as far as weather is concerned. If Mother Nature allows it, February makes a great month to start prepping for a garden that will blossom later in the year.

1. PROTECTING AGAINST COLD WEATHER - February is one of the coldest months of the year. Any plants that are wintering over may need some extra protection at this time of the year, so take care to keep an eye on weather conditions and insulate your plants as required. Typically, using any type of cloth-like material as a cover is sufficient. Just remember to take the covering away as soon as the weather improves again. This may mean removing and replacing the cover on a daily basis for a few days. Another insulating material that is popular is straw. It is usually very easy to find bales of straw in the months of October and November. Some gardeners like to break the bale apart and cover the plants with the straw. If you do container planting in a very cold climate, it is often best to leave the straw in the bale form and just place bales like a wall against the containers - giving more protection against the cold, winds, and snow/freezing rain. For extra protection, just break up a bale or two and cover the plants with the straw. Unlike cloth, this method does not require you to remove the straw until the weather improves in the springtime.


2. PREPPING SOIL FOR VEGETABLE GARDENING - Sometimes, February can be a good month to begin tilling and prepping the soil for early planting. Of course, this depends on the weather zone that you live in. You should only try prepping the soil when it is dry enough to work. An easy test you can do to determine whether or not the soil is ready is to simply take some soil in your hand and squeeze. If water drips out, then the soil is still not ready to work. February can also be a good time to amend the soil with additives such as compost and other organic matter. Starting seeds indoors for planting later in the spring is ideal during February. Just use a good planting/potting soil in which to start the seeds. Best results will come if seedlings are started in a warm, bright spot.

3. PRUNING TREES - Although it is often the coldest month of the year (or perhaps because it is often the coldest month of the year), February is one of the best months for pruning fruit, shade and other flowering trees. With the flowering trees and bushes like forsythia and spirea be sure to prune them AFTER they've finished flowering. Some basic reasons for pruning include improving the shape of the plant, improve air circulation, and give better sun exposure. Be sure to remove dead or broken branches. Suckers and branches pointing down towards the ground should also be removed - not only to improve the shape of the plant, but to improve production of fruit trees. NOTE: Pruning roses should not be done until late in February or March.

4. PLANTING AND TRANSPLANTING FRUIT TREES AND BERRIES - February can be a perfect time for planting or transplanting most varieties of garden trees. Taking advantage of their dormant season allows them to be planted/transplanted without causing them to suffer from transplant shock. Take advantage of the season to set out the various types of berries, too. Roses as well as deciduous and evergreen shrubs can also be planted in February.

5. FERTILIZING AND SPRAYING - Mid February or later is when you should start thinking about fertilizing trees and evergreens. A good all purpose garden fertilizer is desirable for roses, fruit trees, flowering trees, and deciduous trees and shrubs in general. Other fertilizers such as a rhododendron fertilizer can be used to feed evergreens, azaleas, and obviously rhododendrons. Be sure that you use plenty of water after applying the fertilizer, especially if using a dry fertilizer. The last application of winter dormant spraying can also be done. Spray when there is very low to no wind and when temperatures are above freezing.

Saturday, January 23, 2010

Small Space Vegetable Gardening

All that’s required to grow fresh greens continuously is basic gardening knowledge plus a little light, a little soil or water, and a little air. With a little more elbow grease, you will have a productive kitchen garden full of fruits and vegetables.The real joy of small-space gardening is the creativity and resourcefulness it demands.

Maybe the main source of light for your wintertime container garden is what’s reflected off the snow beyond your windowsill, or the fluorescent tubes under your kitchen cupboards, or perhaps you’ve sprung for one of the compact, countertop hydroponic units now available (more on those in due time). Maybe your summertime city garden is so hot, you’re growing lettuce in the shade of tomato and baby pumpkin vines, or in hanging baskets beneath the fire escape. No matter what your space limitations or budgetary constraints, it’s possible to eat homegrown vegetables year-round.

What’s more, when you use (and reuse) simple materials such as kitchen compost and open-pollinated vegetable varieties, you’ll be going green in the most basic and meaningful way — with sustainable sources of plant nutrients and seed.

Friday, January 15, 2010

Gardening is making a popular comeback


Change has come to America. The pop culture phrase "show me the money," boiling throughout business and industry, has cooled down and is forcing people to take a hard look at what is really important in life.

 "Just look around you," says Susan McCoy, trend spotter and outdoor living expert. "Our relationship with money has changed. Hard work, common sense and a return to small-town values are causing a shift in priorities from boardrooms to backyards."

According to GMG's 2010 Garden Trends Report, "The rewards of growing your own - from basil to berries to flowers - are boundless," says McCoy.

Here is a glimpse of what McCoy and her team of trend spotters see for 2010.

* Edible gardens are in. Lawns are out.

Growing your own groceries is hotter than ever and is transforming homes and communities. A recent survey by the National Gardening Association shows a 19 percent burst of new hobby country farms and urban edible gardens over last year.

"It's time to reclaim our land for our greater good," says Margie Grace, the 2009 International Landscape Designer of the Year, awarded by the Association of Professional Landscape Designers. "Take that food-producing garden from the back 40 and put it wherever we want. Reunite the ornamental with the edible - roses beside tomatoes, beds edged with herbs, and veggies used as annuals."

Grace is one of many wanting to "de-lawn" America. Front lawns are being transformed into vegetable and rain gardens. "Hell strips" - the patch of high-maintenance lawn or dirt between the sidewalk and street - are being planted with sustainable flowers, grasses and shrubs that need little to no care.

Gardeners with limited space are finding ways to have fresh herbs and vegetables in their kitchens. Innovative plant systems like Fertile Earth's new Simple Gardens come with soil, seeds and a how-to guide packed in stylish square containers that make it a snap to grow kitchen gardens in any bright spot. Just add water.

* Slow gardening is in. Instant gratification is out.

With the rising demand for locally-grown food, organic and energy-efficient products, people are gardening for the greater good. According to Lifestyle of Health and Sustainability, (LOHAS) seed sales are up 30 to 50 percent and canning saw a whopping 45 percent increase. Along with vegetables, people are planting and picking fruits and berries - especially blueberries and raspberries -  for their nutritional value and ornamental good looks.

Many new products on the market are designed to help sustain the environment. Space-age technology saves gardeners time and water. AquaLok, a sustainable hydration system from Costa Farms, is a self-watering system for plants made from recycled soda bottles. It allows plants to thrive without drainage, and reduces watering needs by more than half.

For the do-it-yourself gardeners, add just a little GeoHumus, a new soil additive made from volcanic rock combined with state-of-the-art super absorbents, to all your containers and new plantings. It stores water and releases it to the plants on demand.

* Eco-boosting is in. Chemical-dependent gardens are out.

Demand is up for earth-friendly, sustainable and organic garden products, like the first OMRI-listed compost-based premium blend potting soil from Organic Mechanics Soil Company. The caviar of potting mixes, the all-purpose premier blend is easy to use for all your planting needs.

For all-natural garden products and animal and insect repellents that are environmentally safe for people, pets and plants, turn to innovative companies like The Liquid Fence Company. The company just released FreezePruf, a revolutionary spray that helps plants withstand fall frosts and spring frosts, extending the growing season by a couple of weeks in fall and spring.

* Multi-tasking is in. Single-purpose gardening is out.

Roofs are no longer just for parties. Green roofs are springing to life in cities and small towns, transforming barren space into lush gardens that help cool buildings, absorb rainwater, filter air pollutants, and create wildlife habitats.

Folks are bringing the outdoors in with houseplants. Mini orchids from Costa Farms are affordable, easy to care for, and come in a wide array of colors that are perfect for decorating rooms and gift-giving. Indoor plants are living art accents that provide oxygen, and remove carbon dioxide and harmful volatile organic compounds, 24/7. Check out these natural air-cleaning machines at www.o2foryou.org.

* Perennials and shrubs are in. Divas are out.

Sustainable landscapes, water conservation, perennials and small edible shrubs are hot as gardening with natives attracts needed pollinators and birds, critical for the balance of nature. Consumers are looking for plants that are easy care, have great color, and are pest- and drought-resistant, like the new hardy early and repeat blooming daylily - Jersey Earlybird 'Cardinal'.

Demand is up for sustainable hybrids like rhododendrons and grasses that provide great impact with little fuss. Look for a new hardy hybrid rhododendron and the first-ever tri-colored Hosta  from Briggs Nursery. Rhododendron 'Trocadero' is a compact grower with bright red trusses and Hosta 'Trifecta' is a drought-tolerant stunner that helps shape landscapes with striking good looks and easy care.

Proceeds from The American Beauties Native Plant collection help support the National Wildlife Foundation's Backyard Habitat program. Families are connecting with each other - and the earth - as purposeful gardening for wildlife catches on. For a complete GMG 2010 Garden Trends report, visit www.gardenmediagroup.com.


Courtesy of ARAcontent

Thursday, January 14, 2010

Small Space Garden - Challenge it With Vertical Gardening

One of the solutions when you are faced with the challenge of small space gardening is vertical gardening. You have to think of growing plants and flowers vertically if you have a balcony garden or a small patio or rooftop garden. It will be easy to plan a lush wall of vegetables, flowers or foliage plants. Fences and wall plantings are very common examples of vertical gardening and are worth trying. You can use your imagination and try out different styles and do not forget to use your landscaping ideas

You can buy both structures and installations for movable wall units from various companies. You can also use this for making an indoor wall covered with lively plants and flowers. You have to make sure you give proper attention to the colors. Both, the color of leaves and flowers are very important. Your likings combined with your imagination should make wonders in your garden and home.

There are various benefits of using this type of gardening:

1. More plants, vegetables and flowers can be grown in a vertical structure using less ground space.
2. The vertical design can be useful for people with difficulty in walking around a large garden.
3. Gardening on vertical walls, trellis and arbor can give them more exposure to sun light and air.
4. Vertical garden wall structures can be used to obtain privacy for your areas.
5. These types of vertical garden structures can be used to provide shade for you to a certain extent.

Good luck for your beautiful vertical garden and watch your small space garden come to life with your landscaping ideas.

S. Jacob is a great friend. As you can see from his article he has a lot of passion. Check out his new project over at http://frontyardlandscape.net/index.php. He loves a good  front yard landscape.

Build a square-foot garden


Want to make the most of a small yard? Use this ingenious method to grow your own veggies.
Square-foot gardening is an easy way to harvest a succession of fresh produce from the smallest of yards and even those with poor soils. Developed by Mel Bartholomew in the early 1980s, the concept remains popular today because it offers a simple plan for growing vegetables in compact, raised beds that can be intensively planted with a variety of crops.

A square-foot garden can be confined to one or as many raised beds as the yard can accommodate. The basic unit is a shallow, 12-inch deep box measuring 4 feet by 4 feet, which rests on top of the ground. Filled with soil, the raised bed is then divided into 16 one-foot squares, each one planted with a single type of vegetable or herb. Because of the limited space, spreading plants such as cucumbers and squash can be trained to grow up obelisks or bamboo tepees. It’s more difficult to accommodate root vegetables, such as potatoes, which need greater soil depth, so these might be better grown in a conventional plot.

The compact dimensions of the raised bed make it easy to reach crops from all sides to weed, water and fertilize. Gravel pathways separating the beds—if you have more than one—allow easy access and also reflect sunlight and warmth so vegetables establish and grow more quickly than in conventional gardens.

Here’s how to build a square-foot garden in your backyard:

1. Because most vegetables and herbs grow best in sun, find a spot that receives at least six hours of sunlight daily. Ideally, choose a location handy to the kitchen that is close to a water source, too.
2. The wooden frame for the raised bed can be constructed at any time of the year—even during the winter in a large basement workroom or in a heated garage—then, assembled on site at the start of the growing season.
3. To build the frame, cut eight four-foot lengths of 2 x 6 cedar or pressure-treated lumber. Screw or nail four of the planks together to form a box, reinforcing each corner with a 12” long 4 x 4 post (or use heavy gauge corner hinges available at specialty stores). Repeat with the remaining four planks to form a second tier so the sides of the box are 12” deep.
4. Spread newspapers or landscape cloth on the ground to help suppress weeds. Then, fill the box with a mix of equal parts topsoil, compost and manure. Rake soil evenly.
5. Using pushpins, tacks or finishing nails, divide each side of the box into four one-foot sections. Then, form a grid of 16 squares by running parallel lengths of string from side to side across the bed using the pushpins as a guide.
6. Plant one type of vegetable or herb in each square of the grid, siting tall ones at the north side so they don’t block the sun. One large plant, such as tomatoes or pole beans, might take up an entire square while larger numbers of smaller ones—radishes and scallions, for example—can be sown in others. Then, remove the string. To prevent overcrowding, consult packet directions to determine spacing requirements, and thin out seedlings as they grow. Plants growing in each square will weave naturally into those in other squares, forming a pleasing quilt-like effect. Water, weed and fertilize as you would in a conventional garden.
7. When early crops have been harvested, replace them with a late-season vegetable, such as cabbages, kale or a second sowing of carrots, topping up and enriching the soil with compost.

Enjoy growing and harvesting your vegetables!

Decorate a potted spruce for winter

This handsome outdoor arrangement will bring enjoyment throughout the coldest months. Though it looks luxurious and richly textured, it's surprisingly easy to replicate. The main element is a 90-centimetre-tall, potted blue spruce, which has been placed in a large, frost-resistant, fibreglass container and decorated with boughs, branches, leaves and cones. (If you already have a potted dwarf conifer, simply decorate it as described. Alternatively, substitute a small, freshly cut, well-anchored Christmas tree for the spruce.)


Shopping list

* One potted blue spruce (such as Picea pungens ‘Compacta', ‘Corbet', ‘Bakeri', ‘Fat Albert' or ‘R.H. Montgomery'), about 90 centimetres tall
* Silver fir (Abies alba) boughs
* Southern magnolia (Magnolia grandiflora) stems with leaves
* Variegated Oregon boxwood (Paxistima myrtifolia) or Variegated boxwood (Buxus sempervirens ‘Aureovariegata') branches
* Large, staked pine cones
* Western red cedar (Thuja plicata) boughs

You'll also need:

* Large, frost-resistant container
* Pruning shears or secateurs
* 22-gauge florist's wire and cutter
* Gardening gloves
* Anti-transpirant spray for cut branches (do not use on potted blue spruce)

Step one: Position potted spruce in a large, frost-resistant container with drainage holes. Insert a generous assortment of boughs and branches around the tree's base as shown, pushing them well into the soil (do not cut them too short or they will dry out). Cascade a few more over the rim of the container to hide its edges.

Step two: Using florist's wire, bind together two pieces of variegated boxwood, one staked pine cone and a large magnolia stem. Create as many of these clusters as you like, positioning them as desired among the upper boughs of the spruce. Affix clusters with additional wire.

Step three: Water pot well and keep soil moist until freeze-up; the spruce may overwinter in warmer arts of the country. For extra insurance, water during any late-winter thaws and, when possible, heap some snow around the spruce to keep it from drying out.

Wednesday, January 13, 2010

Deter ‘deer drama’ this winter


Deer do some of their worst damage to your garden, landscape, trees and shrubs in winter, when other food sources are hard to come by.


“In the early 1900s, there were probably only about half a million deer spread out all over the country,” says James Messina of Messina Wildlife. “Today, there are more than 15 million. Deer, it turns out, adapt quite well to life in suburbia. Keeping them away from residential and commercial landscaping can help everyone – deer and homeowners – to co-exist more happily together.”
With no place to go and not much left to eat in the dead of winter, deer can wreak havoc in your backyard and destroy new buds and leaves before they ever have a chance to grow.  As seasons change, the preferred food sources of deer change as well.

Deer develop new browsing trails as food sources change with the seasons, and repeatedly follow them through the season until new food sources begin to appear. That’s when the deer drama begins ….

Whitetail deer can consume, on average, 12 pounds of foliage a day.  And in the winter, when natural food sources are scarce, they’ll give homeowners more trouble than any other time of year.  The more snow we get, the worse the problem becomes.  A winter of consistent snow coverage is great for bulbs and perennials, but evergreens face the toughest challenge from hungry deer looking to survive.

Deer are creatures of habit, and contrary to popular belief, the majority of them do not migrate.  Bucks are known to travel more than 100 miles, but does will stay within the same three to four square miles for their entire lives.  This means the deer you see this year are probably the exact same deer you saw last year.  It also means that once they’ve found a food source, potentially yours, they’ll be back time and time again.

Fend off deer by applying repellents before you see the damage, encouraging the deer to move along and not include your landscape in their browse buffet.

Repellents rely on deer's strong sense of smell and range from commercial products to homemade concoctions of human hair, blood meal or chunks of deodorant soap. But traditional animal repellents have become less effective than they were decades ago, Messina notes.

“That’s because many of those repellents rely on a bad smell – like the stench of a rotting carcass – to fool animals into thinking a predator’s kill is in the area and the predator may be returning for it,” he says. “But the number of predators out there has actually declined, and deer know it. They’re much less afraid of predators, so relying on ’scare tactics’ has a greater tendency to fail over time.”

Some deer have also built up a resistance to chemical deterrents. Plus, increasingly eco-conscious homeowners prefer not to put potentially harmful chemicals into the environment.

More homeowners are turning to organic alternatives, like Deer Stopper, a repellent formulated from plant extracts. This organic option works because it confronts deer by using their natural repulsion to certain plant smells and tastes rather than relying on fear of predator tactics.

“We know that deer will eat more than 500 different types of plants,” Messina says. “Normally, they’re quite discriminating. But in fall and winter, they become less picky and much more of a threat to suburban landscapes. Still, like many wild animals, deer rely on taste and smell to judge if a food may be harmful to them. If your backyard foliage tastes or smells unpleasant to them, one bite and they’ll move on.”

Deer Stopper by Messina Wildlife Management is the only organic repellent in the country certified by the Organic Materials Review Institute (OMRI). An effective taste deterrent, Deer Stopper is 100 percent organic and completely safe for use on all types of plants and shrubs. OMRI lists it as approved for use by organic growers. The smell- and taste-based technology also eliminates the need to use foul, odor-based repellent products, which can be quite unpleasant for homeowners' use.

Deer Stopper actually smells good to humans. Lightly misting vegetation once a month, even during the cold and snowy winter, will keep deer away all season long.

This winter protect your plants and shrubs and create your own boundaries for foraging bucks and deer. Now you’re in control of the drama.

For more information on Deer Stopper, retail store locations and other wildlife management repellents visit www.messinawildlife.com.


Courtesy of ARAcontent

Tuesday, January 12, 2010

Bring early spring to your home with indoor gardening

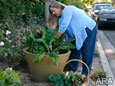
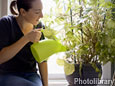
(ARA) - Do images of flowering trellises laden with yellow, pink, green and purple blooms dance through your dreams? You may be ready for some warm spring-like temperatures, but the weather outside is still a little frightful. Ignore the weather and bring spring inside with some indoor gardening.


Not only does bringing spring inside help brighten your home, but houseplants can also improve the quality of the air you're breathing. A NASA study found that houseplants remove up to 87 percent of toxic indoor air inside a sealed chamber within 24 hours.

By planting now, while winter is still in the air, you will have vegetables, herbs and flowers primed for transplanting when warmer weather finally arrives. And since they're inside, you can watch the plants as they shoot their little green stems out of the fresh dirt, monitoring them as they grow.

* Use loose potting soil to promote root growth. Outside, worms and insects tunnel through the dirt, naturally breaking it up to help plants spread their roots. To mimic their effect indoors, use potting soil mixed with peat moss, vermiculite and perlite to create a light texture that won't compact after a couple of waterings.

* Make sure the natural light is adequate. Some plants like direct sunlight and must be located near a south-facing window, while others prefer a few hours of indirect light. But to really keep your herbs and flowers looking strong all season long, consider using artificial light like the Grow Light Pro White from Wards.com, which can also help you get your spring garden started early with seedlings. The Grow Light has four lights that can be turned on as a unit or individually, and it has an adjustable bottom shelf so you can alter the light level as your plants grow.

When plants don't get the light they need, they start to appear thin and frail. As your plants begin to grow, make sure to rotate the pots so the stems grow straight, rather than bending unnaturally toward the source of light.

* Keep the humidity level above 50 percent with a humidifier. Not only will your plants appreciate the extra moisture, but so will you. When the humidity drops below 50 percent, most plants suffer from water loss through their leaves, and it's difficult to regain that water balance, even with frequent watering.

* Really bring spring inside your home with beautiful pots and decorating accents. Visit Wards.com to find beautiful and creative birdhouses that not only are functional, but stylish enough to hang inside. Consider hanging a wire birdhouse in the shape of an acorn in the kitchen window, or using a set of two birdhouses as a unique decoration for your entryway.

* Mix art and fun together with some ivy. Ivy topiaries are very easy to grow, and there are many creative planters and forms you can use to support the ivy as it winds its way toward the sun. Are you a music fan? A guitar and music stand with little pots incorporated into the design can help brighten up your living room. Or maybe you prefer a vintage look created by placing a Madeline Dress Form over your vines, allowing them to grow and construct the skirt. Both styles are available at Wards.com.

Courtesy of ARAcontent

Monday, January 11, 2010

Winter's hottest new 'in' activity: birdfeeding


(ARA) - Bird feeding is in. More than 65 million Americans are doing it, according to the U.S. Fish and Wildlife Service.


Bird feeding draws plenty of devotees and it's easy to see why. Attracting birds to your backyard is a relatively low-cost way to relax, enjoy nature and beautify your winter surroundings. And it can be done by people of virtually all ages and levels of physical ability.

The majority of North American birds suffer from loss of habitat. Investment in avian habitat will return valuable dividends for birds and tons of backyard enjoyment for us. Now, as a new season is just beginning, it's a perfect time to get started.

To attract the widest variety of birds, landscape your property with plants that offer birds cover and natural foods and always provide a source of water.

Need for feeders

When the ground is covered with snow and ice, it's hard to resist just tossing seed out the door. But it's healthier for the birds to get their "hand-outs" at a feeding station, off the ground. Food that sits on the ground for even a short time is exposed to potential contamination by dampness, mold, bacteria, animal droppings, lawn fertilizers and pesticides.

Sometimes it can seem like forever before birds notice a new feeder. Be patient and they will eventually come. And remember, if you fill your feeder only after it's been empty for awhile, the birds will look for food elsewhere. They'll return as long as you continue to fill it.

There are a multitude of feeders out there to choose from. Check out Web sites like www.BirdWatcherSupply.com for some good choices.


Winter feed and seed: food for fat

Winter weather is hard on birds. Their calorie requirements increase, food becomes hard to find, snow covers up seeds, and ice storms seal away the tree buds and wild fruits. Tiny birds must eat a third to three quarters of their weight each day. When the temperature dips below zero, easy meals at a feeder can mean the difference between life and death.

It's important to stock your feeder with high-quality foods that will provide birds with the most fat, nutrients and energy.  Look for a feed like Cole's that is nutritious, preserves freshness, and gives you the most feed for your dollar. Cole's Oil Sunflower is over 99 percent pure and is cleaned more than four times to ensure there are more seeds and fewer sticks in each bag. The feed is also nitrogen-purge packaged, just like potato chips, to ensure freshness and insect-free feed.

Birds love suet. It's the solid fat rendered from beef, venison, or vegetables that provides concentrated energy to help birds make it through freezing winter days and nights.

Cole's Wild Bird Products offers a good selection of suet cakes formulated to attract the largest variety and number of wild birds as well as specific bird species.  They also have a new Hot Meats suet cake.  This product is infused with habanero chili pepper - a patented technology researched and approved by scientists from Cornell to keep squirrels away. Birds love it and squirrels hate it, finally solving the age-old problem of squirrels at your feeder.

To cater to seed-loving birds, try Cole's Nutberry Suet Blend. It's a unique seed blend mix of premium human-grade cherries, apples and blueberry-flavored cranberries, preferred nuts, nutritious insect suet kibbles, and whole kernel sunflower meats. It appeals to both fruit and insect-loving songbirds.

Birds, like humans, do have food preferences. Feed them what they like and they'll keep coming back for more.

For more information on Cole's Feed visit www.coleswildbird.com.


Courtesy of ARAcontent

Don't trash that banana peel - composting is an easy, eco-friendly alternative


(ARA) - Recycling is certainly not a new concept. In fact, gardeners have been using one form of recycling - composting - for about as long as people have tilled the soil. Composting is a cost-effective, eco-friendly way to give your garden a boost.

Start your compost pile now, before winter settles in, and come spring you'll have a jump on nutrient-rich compost to help your garden produce its best harvest. Composting happens by itself through natural decay and the breakdown of organic matter. Depending on your local climate, the composting process may not be fully completed with useable humus or compost until temperatures warm up.
"Composting is easy and can be done for as little as $10 - or even free if you build your own bin," says Bruce Augustin, senior director in research and development with Scotts. "It's a great way to provide essential nutrients to your soil, while recycling kitchen and yard waste, which helps keep refuse out of landfills."

It's easy to get started composting: find a compost bin, gather materials, build your pile and compost. Augustin offers the following easy-to-follow steps for getting started:

Begin with a bin

Containing your compost pile in a bin saves space, hastens decomposition and helps keep the pile neat. You can find many pre-made compost bins at home centers and garden stores. Or, you can build your own from plans found on the Internet with materials around your home.

Gather materials

There are two main sources of materials for your compost pile - your yard and your kitchen. From the yard, you can gather leaves, grass and plant clippings, and shrub or tree trimmings. From the kitchen, add fruit and vegetable peelings, coffee grounds (including the filters), tea bags and eggshells. It's okay to toss in shredded newspaper (not colored or shiny newsprint since these don't decompose readily), but avoid meat scraps, bones, dairy products, grease or pet or human waste since these can all harbor harmful bacteria.

Build your pile

You should build your pile in layers, starting with a 4- to 6-inch layer of coarse material such as twigs or shrub clippings. Then, add on 3 to 4 inches of grass clippings. Next, add another 4- to 6-inch layer of leaves or garden debris and soak with water; moisture will help the microbes decompose the material faster. You can modify this order as needed, depending on the types of materials you have. After a few layers, be sure to add a 1-inch layer of garden soil, such as Miracle-Gro Garden Soil for Flowers and Vegetables.

Maintain compost

"A high-nitrogen fertilizer like Miracle-Gro Water Soluble All Purpose Plant Food, spread over each layer of your compost pile, will help the composting process by creating a favorable nitrogen to carbon ratio," says Augustin. Remember to turn or aerate the pile periodically to help move material from the outside closer to the center of the pile, where it will heat up and decompose faster. During the winter - depending on the region where you live - the center of the pile is where decomposition will take place, and adding water to keep the pile moist will aid the process.

Your compost will be ready to use once it has turned dark and crumbly, and gives off an earthy odor. Add the compost to your garden soil to help nourish your plants.

"Composting is not only beneficial for your garden, but it's also an easy, satisfying way to do something good for the environment," Augustin says.

For more tips on composting and other aspects of gardening and lawn care, visit www.Scotts.com.

Visit For More Gardening Information On Small Space Gardening
Courtesy of ARAcontent

Winter blues in your backyard? Attracting songbirds livens lackluster landscapes

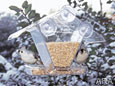
(ARA) - The backyard can seem barren and bleak when the leaves fall off the trees and the last blooming plant retires until spring. But there's an easy way to brighten your backyard and fill it with color and song this winter - charm songbirds looking for an easy, reliable food source.


Birds are the most accessible and abundant of wild creatures that live among us, and every home - apartment to estate - can offer them a safe way station to refuel. To attract the greatest number of birds, choose feeders and foods that suit a variety of wild bird species.

Don't wait until the snow flies to get feeders in place. Fall is a good time to choose a location visible from your favorite window, to secure feeders with sturdy brackets, poles or hangers and to arrange convenient storage for your seed and supplies.

New birdwatchers may be bewildered by the huge assortment of feeders available today. A good place to start shopping is a Web site like www.SongbirdEssentials.com, which can direct you to a nearby retailer or online source.

Feeders come in many sizes and styles, and fall into a few broad categories. The three feeders every backyard bird lover should have include a tube feeder to hold sunflower or nut meats, a hopper feeder for mixed seed and a suet holder to attract woodpeckers and other tree trunk "clingers."

Tube feeders can be made of clear plastic or wire mesh. They're sized to hold peanut kernels, sunflower or nyger seed for finches. Experts recommend filling tubes with just one type of seed so birds don't rummage through the contents in search of their favorite treats.                  
                            
Songbird Essential's Seed Hoop is a unique and useful accessory to keep feeding areas tidy. The mesh tray attaches below feeders and catches 90 percent of spilled seed, keeping it off the ground and away from rodents. The hoop also serves as a platform feeder for cardinals, buntings and juncos.

Spiral Feeders offer three worthwhile innovations: a continuous spiral perch that allows more birds to feed at once, a locking lid to foil squirrels and a twist-off bottom for easy cleaning. A squirrel-proof wire mesh model is ideal for shelled sunflower or peanut hearts.   


Another Songbird Essentials feeder innovation is their "Clingers Only" feeder to primarily serve smaller avian guests like chickadees, small woodpeckers, titmice, nuthatches, goldfinches and others.

Suet is a high-energy fuel that helps birds survive cold winters. Tail Prop Suet Feeders attract the larger red-bellied and red-headed woodpeckers with support for their stiff tails, as well as the smaller and more common downy woodpeckers and nuthatches. Pre-formed suet cakes sized to fit feeders can include seeds, fruit or nuts for extra energy and appeal.

Position feeders near the protective cover of trees and shrubs to offer feathered friends shelter from predators. A small metal trash can with a tight lid is handy for storing seed nearby and a scoop makes refills quick and easy.


Once feeders are up, the wait for the first bird can make even patient people antsy. Experts suggest sprinkling some seed in a shiny pie plate set under feeders. When curious birds come to investigate, they'll find your feeders, too.

For More Gardening Tips Visit Small Space Gardening.

For more information on feeders and other bird necessities visit www.songbirdessentials.com.

Courtesy of ARAcontent